


Sass is CSS with extended functionality. It can help speed up coding and organize stylesheets. That would mean CSS is a prerequisite to writing Sass. Using Sass, as I have mentioned before, has many benefits. Cleaner code, reusability, excellent documentation and tutorials come to mind.
Sass and SCSS
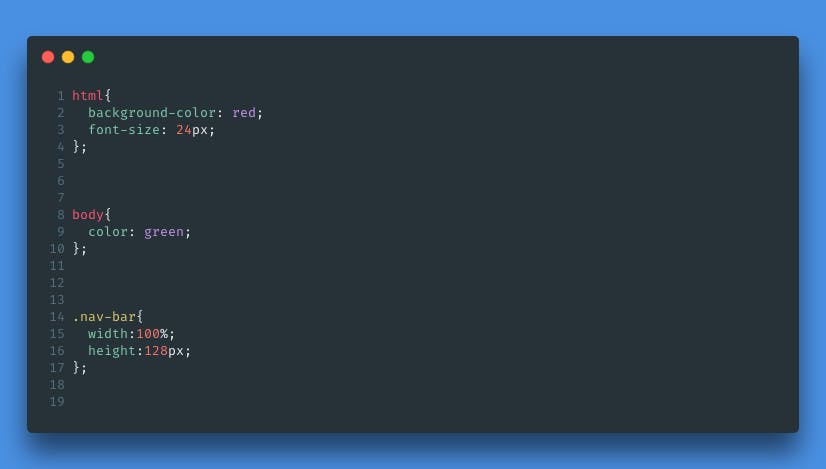
Sass and SCSS are the same. The differentiating factor comes from syntax. This is Scss, which is the exact syntax of CSS.
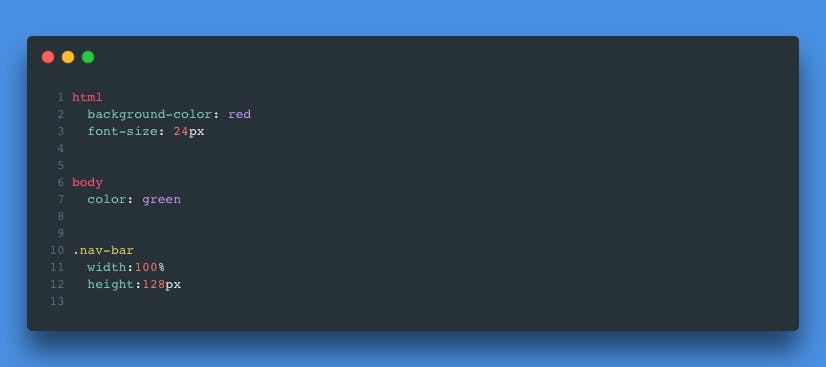
This is Sass, the new syntax which is optional to use and known as the indented syntax. This syntax provides code that is easier to read by omitting curly braces and semi-colons. The file extension must be .sass to use the indented syntax.
Setting Up Sass
How to use Sass/SCSS in your project
Integrating Sass into your project can be confusing at first because of a few extra steps beyond a CSS file. But as stated before, any SCSS code you write is valid CSS. But the browser does not read Sass/SCSS. So how do we get the browser to read our preprocessed code?
It's simple... You Don't! We must compile it into readable CSS code that the browser can work with. Luckily, Scout-App, which requires a download and installation, can solve that problem.
Folder Structure
I like to keep things organized, no matter how few files there may be. So as far as styling sheets go, my usual optimal folder structure goes like this:
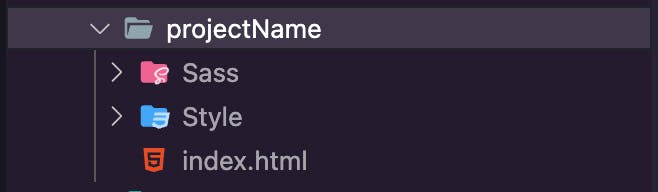
A separate Sass folder within the main project folder holds all Sass/SCSS files. A separate Style folder that would hold any CSS files.
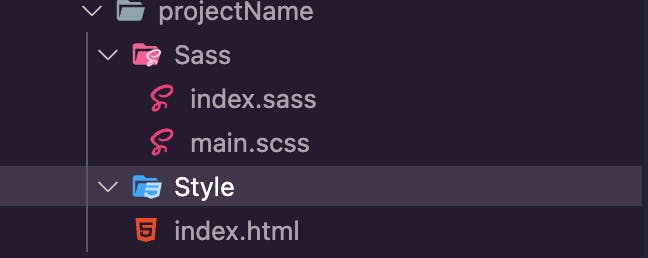
Creating the Sass or SCSS file
Inside the Sass folder, we can create a sass file by having the file's extension be .sass. Further, we can also create an SCSS file using the .scss extension. I tend to use the .scss extension. The CSS syntax is so ingrained in my muscle memory that I have decided to stick with it. But if you select .sass, Scout will also compile Sass into CSS.
Using the Scout App
After the Scout tool installation, open it up, and you will see this welcome page.
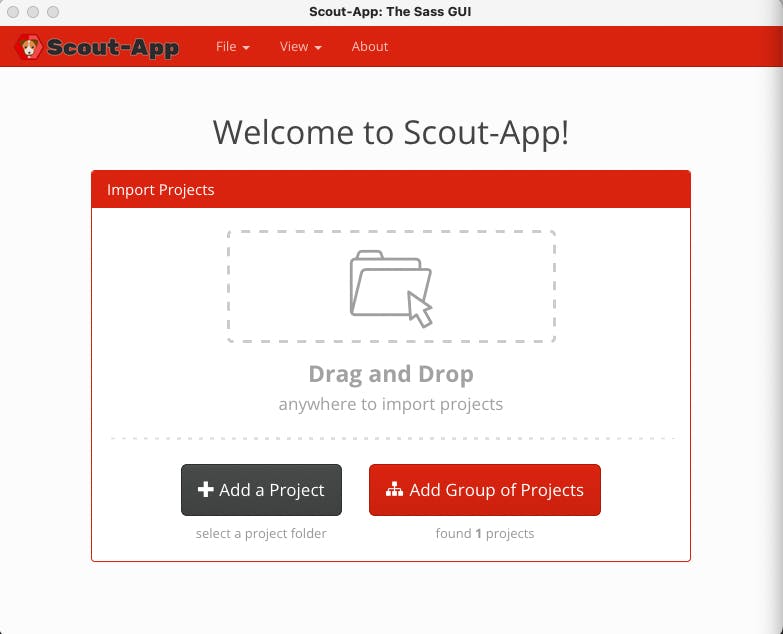
Add the project(s) that you are working on. This excellent tool should select the input and output folder with its correct file path. The Sass folder should be the input, while the Style folder should be the output.
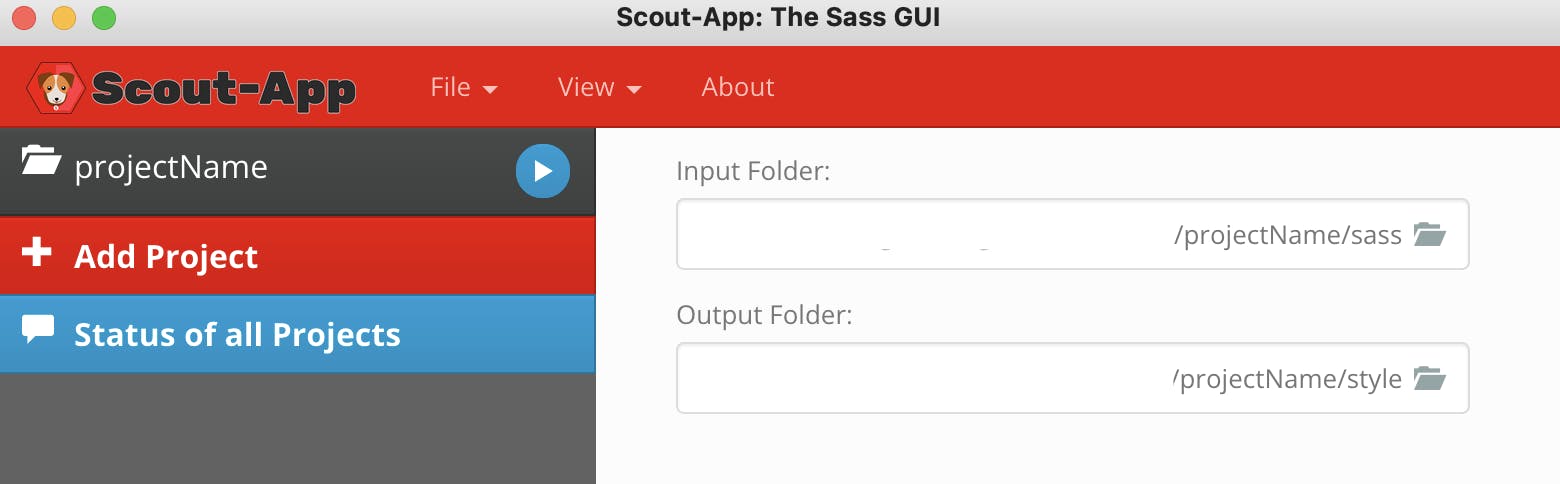
Afterward, click the play button.
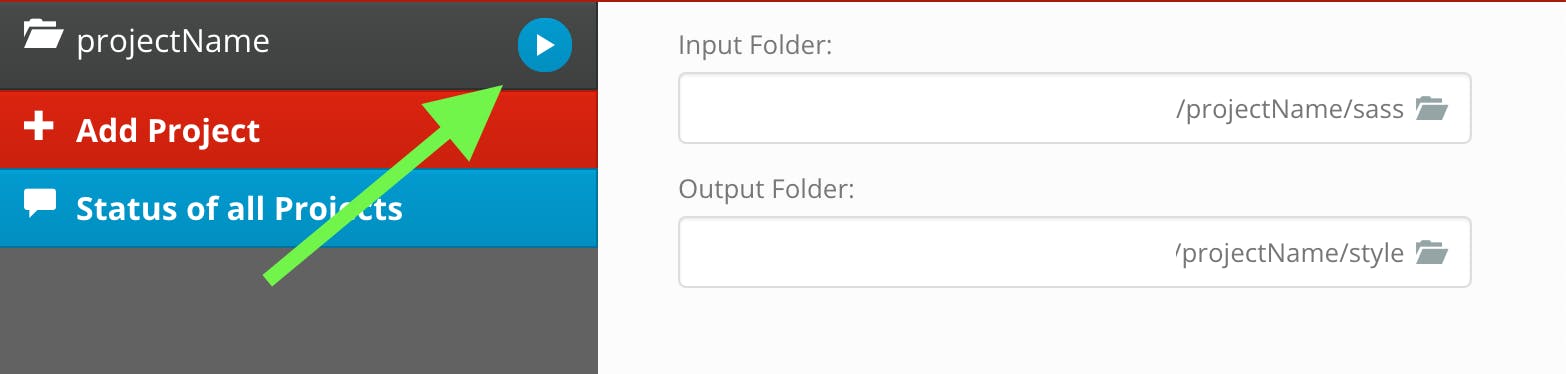
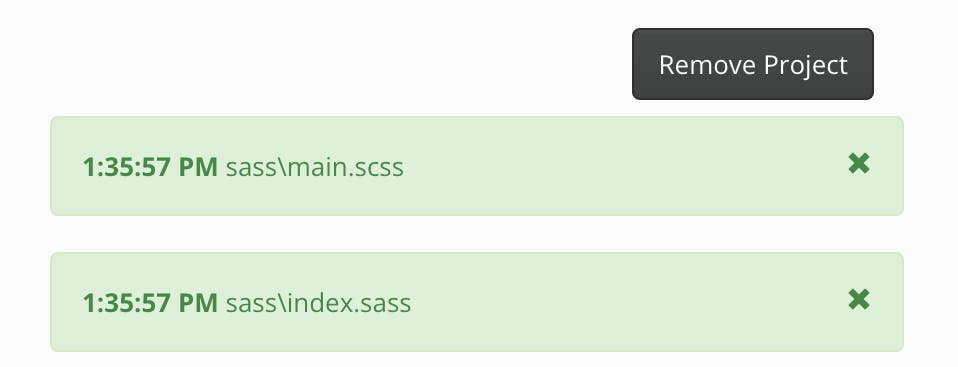
This play button tells the tool to watch for changes in the sass/scss file. It takes the Sass or SCSS code as input and compiles it to a new CSS stylesheet which will appear in the Style folder. This play button tells the tool to watch for changes in the sass/scss file. It takes the Sass or SCSS code as input and compiles it to a new CSS stylesheet which will appear in the Style folder. The name of the new CSS stylesheet should be the linked stylesheet within the index file.
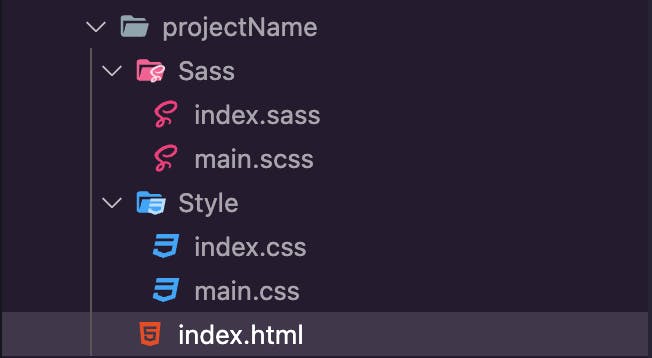
In regards to this example, the link tag's href attribute in the HTML's head should be "main.css".

Green indicates the compiling was a success.
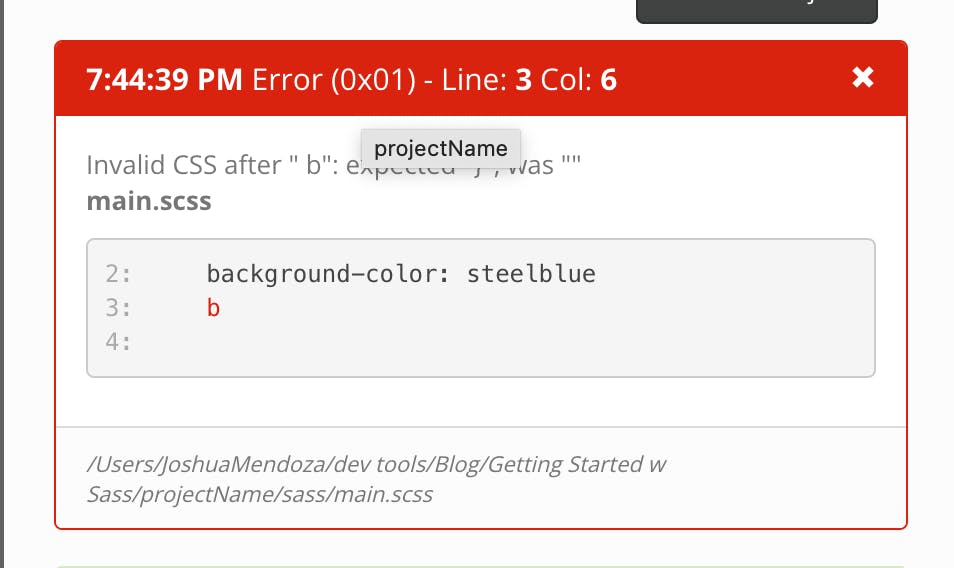
Red indicates an error within the SCSS/sass code that needs a change for compiling to progress.
Until Next Time
So this was a simple introduction to including Sass in your project. No specific syntax, but only the general difference between the syntax of Sass and SCSS. Following the steps laid out in this article, writing any form of CSS within the Sass or SCSS file is valid Sass. Stay tuned and come along the journey as I dive deeper into Sass. This is a powerful and optimal tool that I urge developers to pick up for an excellent front-end workflow.