


Hello World
I welcome to you another tutorial and code along for building a countdown timer. To be able to follow along, it is best to have a good grasp of Javascript classes and its methods along with the following topics:
- Document Object Model(DOM) Manipulation
- Template Literals and String Interpolation
- built-in functions
However, if you are struggling to follow along, I have another web app tutorial that dives into the topics listed above. Check it out if you need to.
Ultimately this is what the outcome should be.

Introduction to Luxon
This project involves the usage of Dates and Time within javascript. But for simplicity in working with Date objects, I decided to use Luxon.
What is Luxon?
Simply put, Luxon is a javascript library that makes it easy to deal with dates and times. You can simply call create instances of classes named in the library to manipulate the data that deals with dates and time. Some of its features, as listed on the Luxon webpage are that it has interval support which will come in handy for a countdown but also has Parsing and formatting, built-in handling of time zones and many more that can be seen in its documentation.
Project Walkthrough
Installing Luxon & Folder Structure
To enable the use of Luxon for this project, there are different installation methods as detailed in its guide, but for quick and simple use, files from a Content Delivery Network(cdn) works just fine for the purposes of this project. The script tag obtained from the cdn will be linked in the head of the HTML file. The script tag that we’ll be working out of, would be included in the body tag.

The folder Structure is as goes:
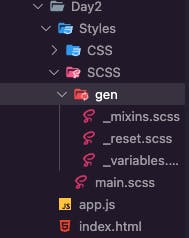
Styles can include your main css file. If working with SCSS, then a designated CSS folder for the css file output, and a SCSS folder that contains the reset and SCSS file.
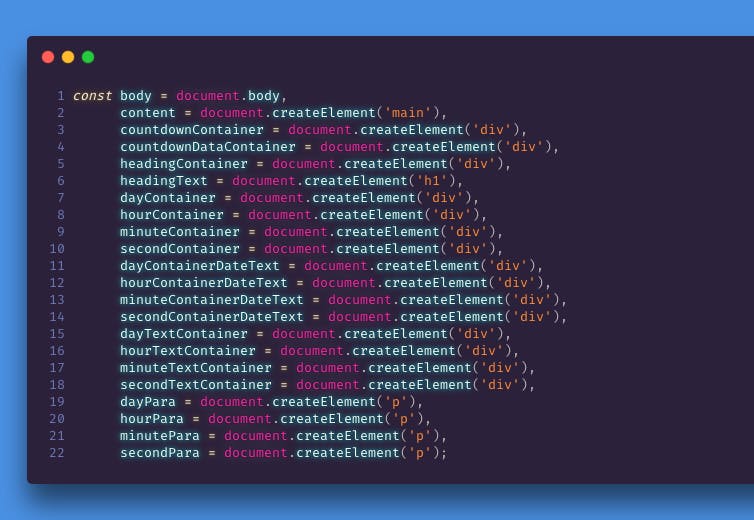
Document Element Manipulation
I usually like to create elements used in a HTML file through javascript, so this next section is dedicated just to that along with setting up the HTML elements for further manipulation. In future projects, to clean the code up, Im thinking of having a javascript file designated just for variables and exporting them for use in other javascript files. But for now, all the variables and everything else is all in one javascript file.
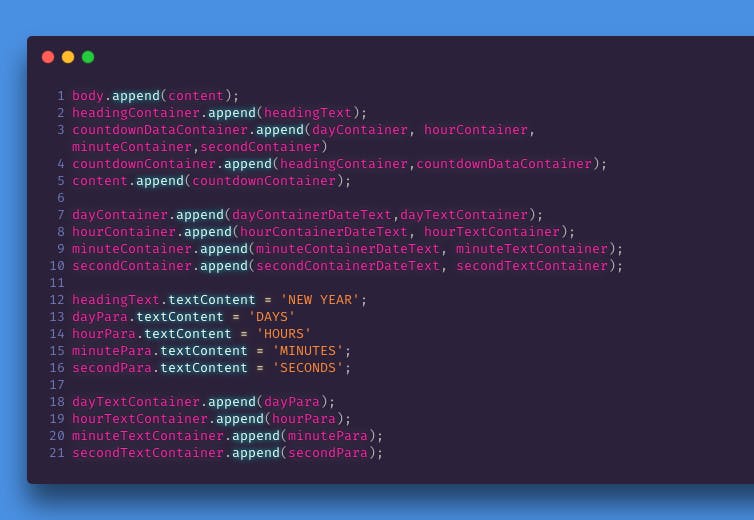
Document Appending
Afterwards we append, lower level elements to its parents and containers. It might seem like overkill, but in terms of styling, it makes everything easier to work with down the line. Easier to position items faster.
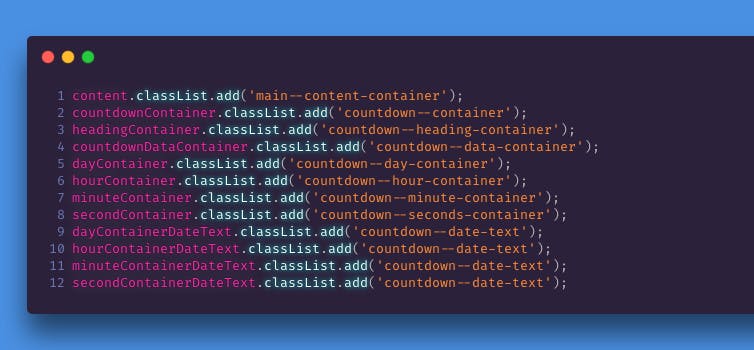
Document Class Lists
Add classlists to the elements created.
Working with Luxon
I enjoyed using Luxon for this project, because it made dates and times a lot more straightforward. That is the purpose of working with javascript libraries, or any coding library for that matter. The simplicity snippets of code can provide.
In laymen terms, Luxon is a class with many methods.
So the first step in working with Luxon is to create two variables that allows access to dates and times.
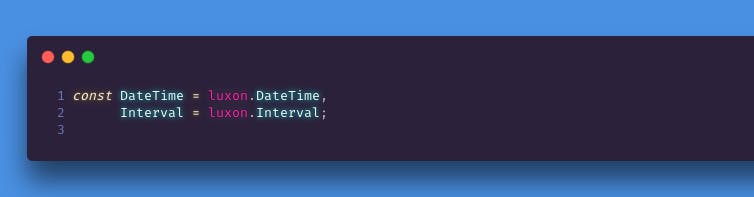
The Datetime data structure creates a Date instance which provides access to a specific Date and time along with its methods. According to its documentation, a DateTime comprises of:
- A timestamp
- A time zone
- Configuration
On the other hand, the Interval object represents interval of time between two endpoints, and by creating an instance of this object, we can use the .fromDateTimes(x,y) method within its creation category, that allows us to calculate the amount of time between x and y.
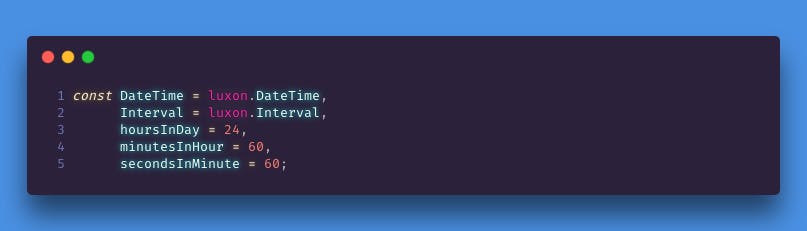
We will also create variables correspondent to time, one for the 24 hours in the day, one for the 60 minutes in an hour and one for the 60 seconds within a minute. More on the purpose of this as we go further in to the logic of displaying the time.
The Timer
This section details the use of creating a function that gets the current date along with a future date and using that data to display the current amount of days left along with the time left for 24 hour format parsing.
The logic/pseudocode for that process is:
- get the date and current time
- get the goal date and time
- get the current time by:
- taking amount of hours in day and subtracting by the current hour
- taking amount of minutes in an hour and subtracting the current minute
- taking amount of seconds in a minute and subtracting the current second
Most importantly a function that displays the countdown data must be created within the function that holds the variables for the date and time in order for the variables to stay local.
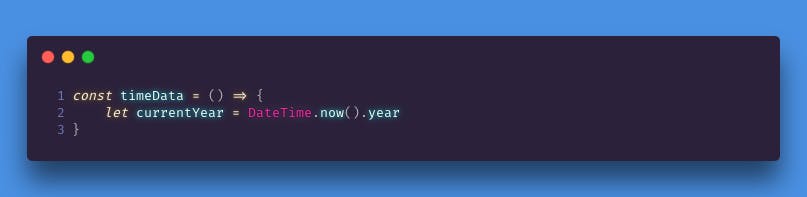
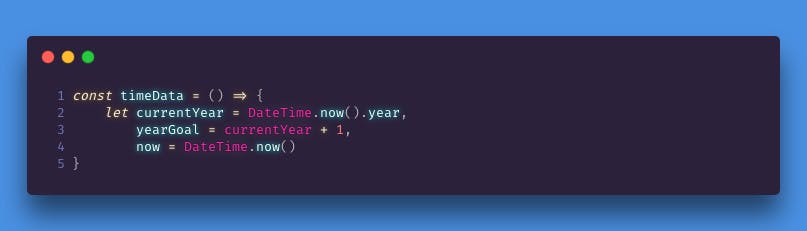
We create a function called timeData. Within that function, the following variables will be created:
currentYear
the current year’s value will be obtained by using Luxon’s DateTime object and its method now(). **we can also access the current year by using the dot notation and referring to “year” from the data provided.
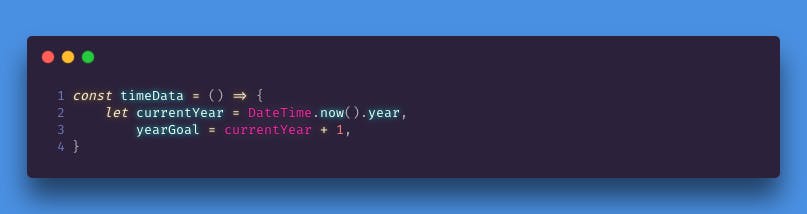
yearGoal
this variables value is currentYear + 1, in order for the countdown timer to update as the years go by. When the timer reaches its goal, a new one is dynamically created.
 now
now
a variable created for the purpose of accessing the current date. Accessed simililary to the currentYear function, but we omit the dot notation.
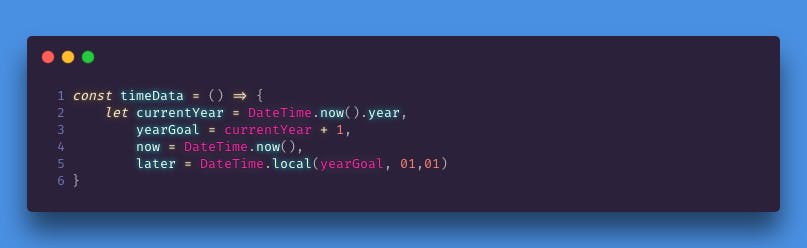
later
Datetime.local represents a millisecnd in time and takes any number of arguments. Our arguments for this object is our dynamically created yearGoal, and the first day of the year along with the 1st day of the month.
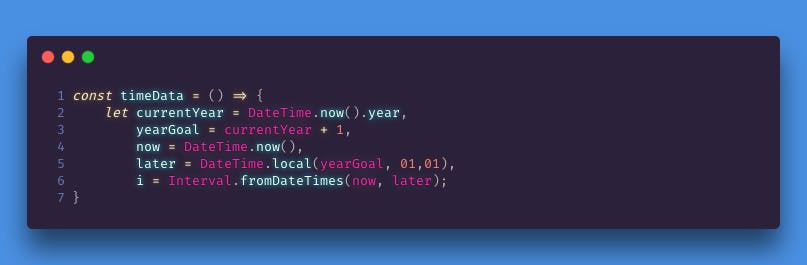
i
As stated before, intervals take two parameters which can be seen as endpoints between one set of time and another. Essentially we are taking the time between the current date and the first day of the following year. The time between “now” and “later”.
The following variables within the timeData function, are for the purpose of parsing the time that will be displayed. For example: If left as is, the time would display as “96 Days 2890 hours 3849892830 minutes 8948494095 seconds”. Instead we use the variables to take for account the current time in the day, and parse it into the format that we are used to telling time with. Such as “22 hours 30 minutes 22 seconds”

And now we create two more functions, one outside of timeData called addZero which will will parse the display of time whenever it falls below 10.
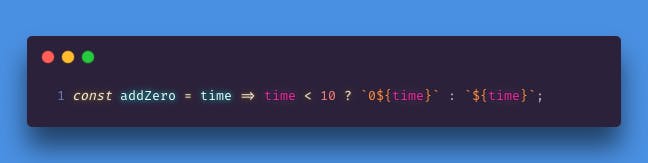
The logic behind this function is:
If the time data falls below the number 10 add a zero to the start 09 08 07
else return the time as per usual
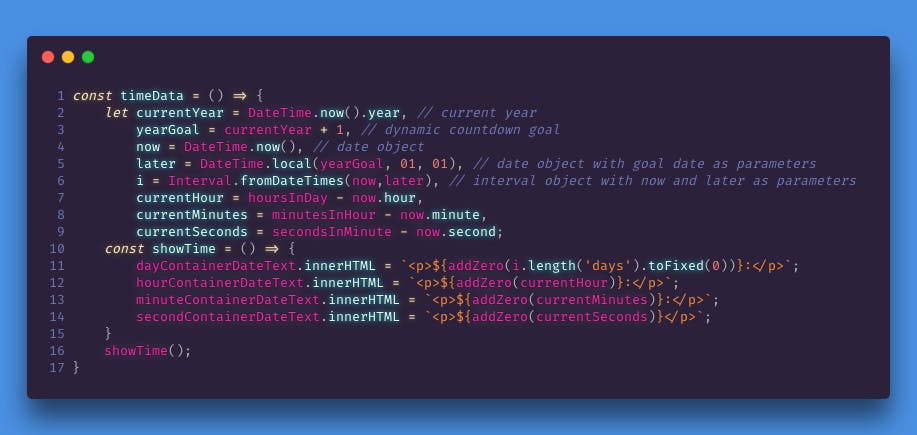
And another function directly inside of timeData, called showTime which will display the data with the current amount of days, hours, minutes and seconds.
Lastly for this function, we call showTime(), for the purpose of keeping the date and time variables local whenever the timeData function is called.
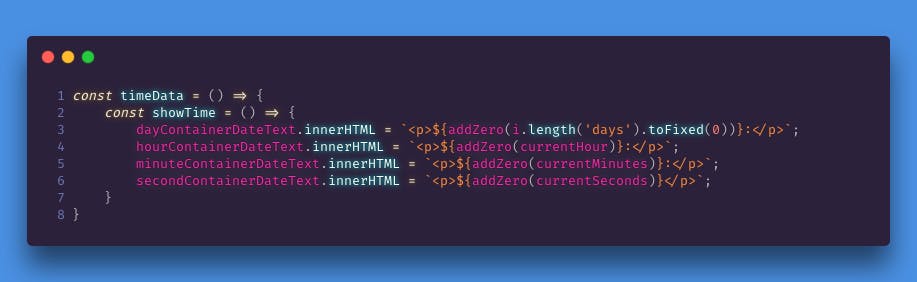
This is what our timeData function looks like
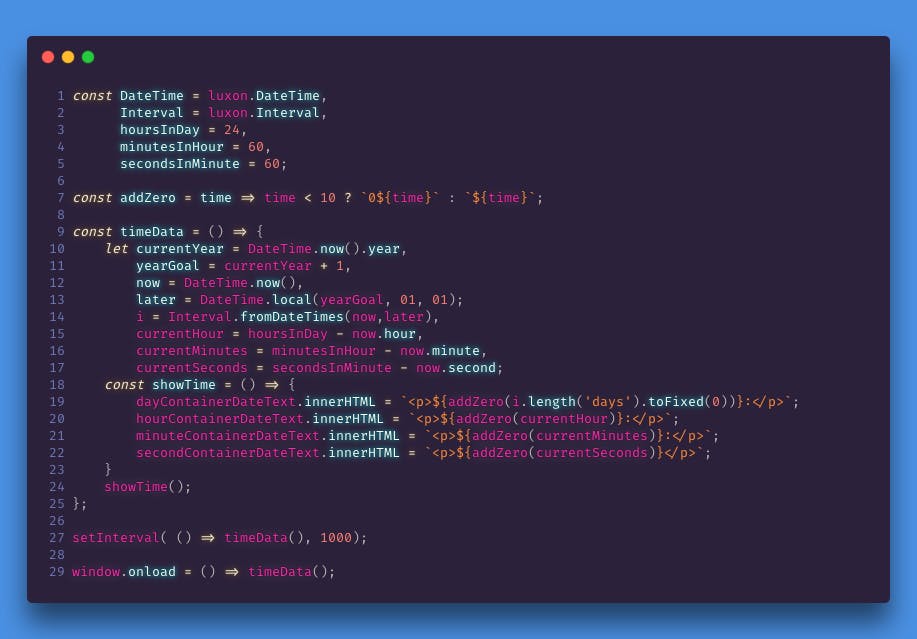
We are not done yet. Two final tasks are needed. We need to get the countdown to actually countdown, in other words, we need to start the timer. We do that by calling the javascript built-in method setInterval().
setInterval() is defined as a method that repeatedly calls a function or executes a code snipped with a specified time delay. So, with that definition in mind, we will be calling timeData() every 1 second, to update the the time displayed. We choose second because we are taking into account the fact that the seconds are displayed.

Last but not least, we call the function timeData() when the window browser loads.
The purpose of having timeData called when the window loads, is to have the countdown displayed automatically rather than waiting 1 second for the setInterval method to call on timeData.

Here is our updated javascript file from when we started working with Luxon.
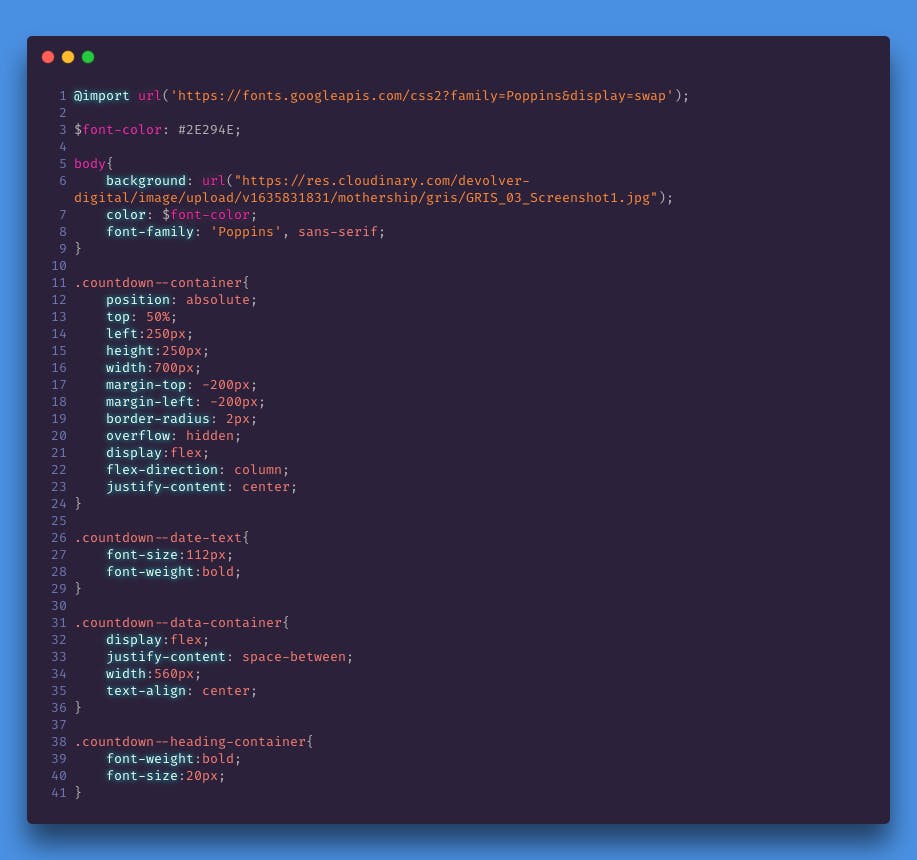
User Interface (UI)
And here is the source code used for the styling of this web app. With the background image provided by wallhaven.
Wrapping Up
You can check out the live preview of the finished project and its source code over at my codepen. Although I didnt dive to deep into the explanation of some javascript concepts, I provided some links that can help out with any confusion. And I’m always willing to provide any extra help. Just write me on @jfusecodes, or dont hesitate to reach out to me via my website.